
|
It is currently Wed Apr 24, 2024 8:21 pm |
|
All times are UTC - 8 hours |
 |
|
|
Page 2 of 4 |
[ 58 posts ] | Go to page Previous 1, 2, 3, 4 Next |
| Print view | Previous topic | Next topic |
My Archangel Build - Mosin Purists Avert Your Eyes!
| Author | Message |
|---|---|
|
Location: Sequim Wa. Joined: Thu Oct 27, 2011 Posts: 233 |
Brian, I like the way you did the muzzle with the Lee case trimmer. How long did it take to do that? I'm thinking about doing that to my M1 carbine which has a damaged muzzle.
|
| Thu Oct 03, 2013 12:53 pm |
|
|
Site Supporter   Location: Redmond Joined: Mon Feb 27, 2012 Posts: 1450 |
jeeper1 wrote: Brian, I like the way you did the muzzle with the Lee case trimmer. How long did it take to do that? I'm thinking about doing that to my M1 carbine which has a damaged muzzle. The actual 'crowning' only took a few minutes. My 308 case length gauges did not fit in the end of the barrel however. So I took an extra one, chucked it in a drill and used sandpaper to turn down the diameter ever so slightly until it just fit in the end of the barrel. the case trimmer had no problem cutting the steel barrel. |
| Thu Oct 03, 2013 12:58 pm |
|
|
Location: Sequim Wa. Joined: Thu Oct 27, 2011 Posts: 233 |
Thank you.
|
| Thu Oct 03, 2013 1:23 pm |
|
|
Site Supporter  Location: Lynnwood Joined: Thu Dec 6, 2012 Posts: 5446 Real Name: Sergey |
You're a freaking mad scientist!
Looks awesome! _________________ Sign up for Uber using this link and receive a bonus: https://partners.uber.com/i/1p9ey |
| Tue Oct 22, 2013 10:13 am |
|
|
Site Supporter  Location: South Seattle Joined: Mon Mar 28, 2011 Posts: 1034 Real Name: elwood |
thats a beautiful looking build you did there, did you use any bedding material when you mounted the rock solid scope mount?
|
| Tue Oct 22, 2013 11:24 am |
|
|
Site Supporter Location: Redmond Joined: Mon Feb 27, 2012 Posts: 1450 |
Rusoarmo wrote: Looks awesome!  db-elwood wrote: thats a beautiful looking build you did there, did you use any bedding material when you mounted the rock solid scope mount? No, I just bolted it to the top. Since it has 3 mounting points it is really secure and I didn't think bedding it would make that much difference. Of course, I could be wrong  |
| Tue Oct 22, 2013 11:28 am |
|
|
Site Supporter Location: South Seattle Joined: Mon Mar 28, 2011 Posts: 1034 Real Name: elwood |
very nice, thanks Brian. i'm in the middle of doing the same build and i'll probably steal that cool bi-pod rail idea from you.
|
| Tue Oct 22, 2013 11:42 am |
|
|
Site Supporter Location: Redmond Joined: Mon Feb 27, 2012 Posts: 1450 |
Awesome! post up some pics when you're done
|
| Tue Oct 22, 2013 11:44 am |
|
|
Site Supporter Location: Redmond Joined: Mon Feb 27, 2012 Posts: 1450 |
Finally got this out to the range today at the group shoot, ran great, I'm very pleased with the final product. Clay pigeons at 100 yards were no problem with cheap surplus ammo.
WAY more comfortable to shoot than my M44. |
| Wed Jan 01, 2014 11:37 pm |
|
|
Site Admin   Location: Renton, WA Joined: Sun Mar 13, 2011 Posts: 52068 Real Name: Steve |
brian wrote: Finally got this out to the range today at the group shoot, ran great, I'm very pleased with the final product. Clay pigeons at 100 yards were no problem with cheap surplus ammo. WAY more comfortable to shoot than my M44. Shit, I missed this one too???  Brian, I'm sharing a bench with you next time. I just want to . . . get to know you better.  _________________ Steve Benefactor Life Member, National Rifle Association Life Member, Second Amendment Foundation Patriot & Life Member, Gun Owners of America Life Member, Citizens Committee for the Right to Keep and Bear Arms Legal Action Supporter, Firearms Policy Coalition Member, NAGR/NFGR Please support the organizations that support all of us. Leave it cleaner than you found it. |
| Wed Jan 01, 2014 11:44 pm |
|
|
Site Supporter Location: Redmond Joined: Mon Feb 27, 2012 Posts: 1450 |
MadPick wrote: Shit, I missed this one too??? : you also missed getting to shoot the desert eagle 50 that was getting passed around |
| Thu Jan 02, 2014 7:26 am |
|
|
Site Supporter  Location: Federal Way Joined: Sat Sep 15, 2012 Posts: 5492 |
Good looking rifle Brian! Wish I could have been there... Next time!
_________________ Banned for calling GOD a racist! Oh that's tight, Seattle guns is DEAD! |
| Thu Jan 02, 2014 7:42 am |
|
|
Site Supporter  Location: Auburn, Wa Joined: Tue Dec 4, 2012 Posts: 850 Real Name: Carpenter |
brian wrote: MadPick wrote: Shit, I missed this one too??? : you also missed getting to shoot the desert eagle 50 that was getting passed around Yeah thanks for letting me shoot that. So after taking out the Mosin how many of the rubber o rings are left on that bolt handle? Great looking build, I might just have to pick up one of those stocks and hack up a 91/30. |
| Tue Jan 07, 2014 12:21 pm |
|
|
Site Supporter Location: Redmond Joined: Mon Feb 27, 2012 Posts: 1450 |
I threw away the last remaining rubber o-ring on the handle.
PS, if anybody is interested in the spare parts: PIF here viewtopic.php?f=28&t=34024 |
| Tue Jan 07, 2014 12:24 pm |
|
|
Site Supporter Location: Redmond Joined: Mon Feb 27, 2012 Posts: 1450 |
Well, I enjoyed shooting it so much at the New year's shoot, that I decided it needed a couple more upgrades. The trigger was incredibly heavy, and the thing jumped around like crazy after pulling the trigger, so here's my solution:
Step 1, Timney trigger. Built in safety, and the archangel is already molded for it. Fit like a glove, nice crisp trigger pull. 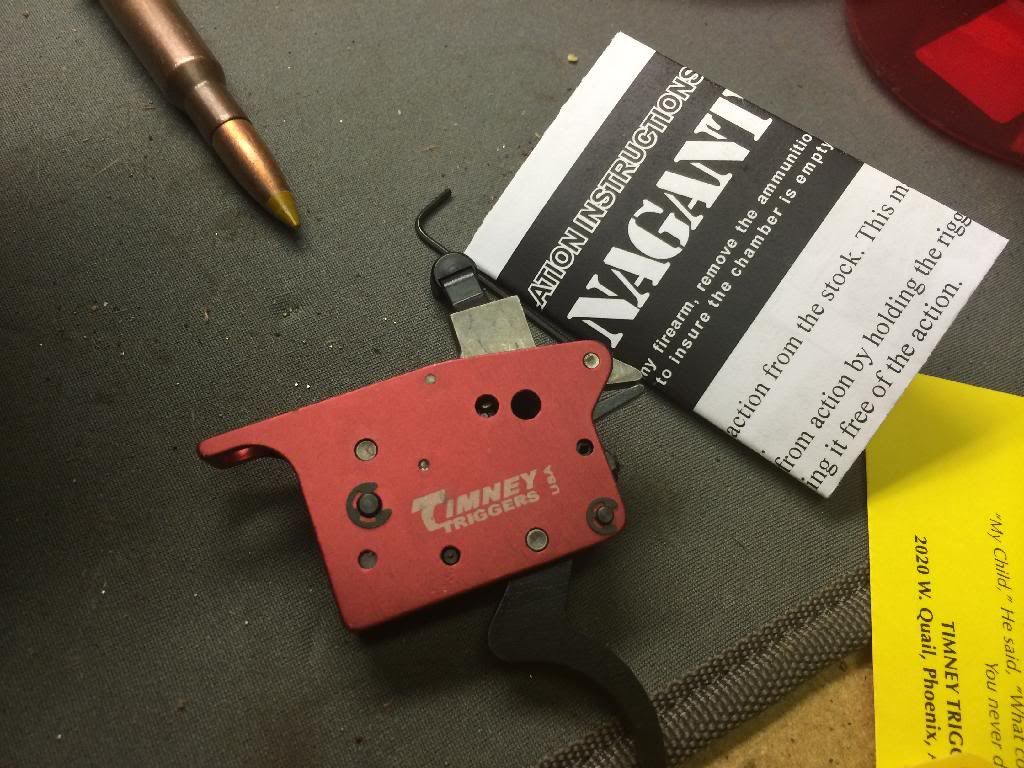 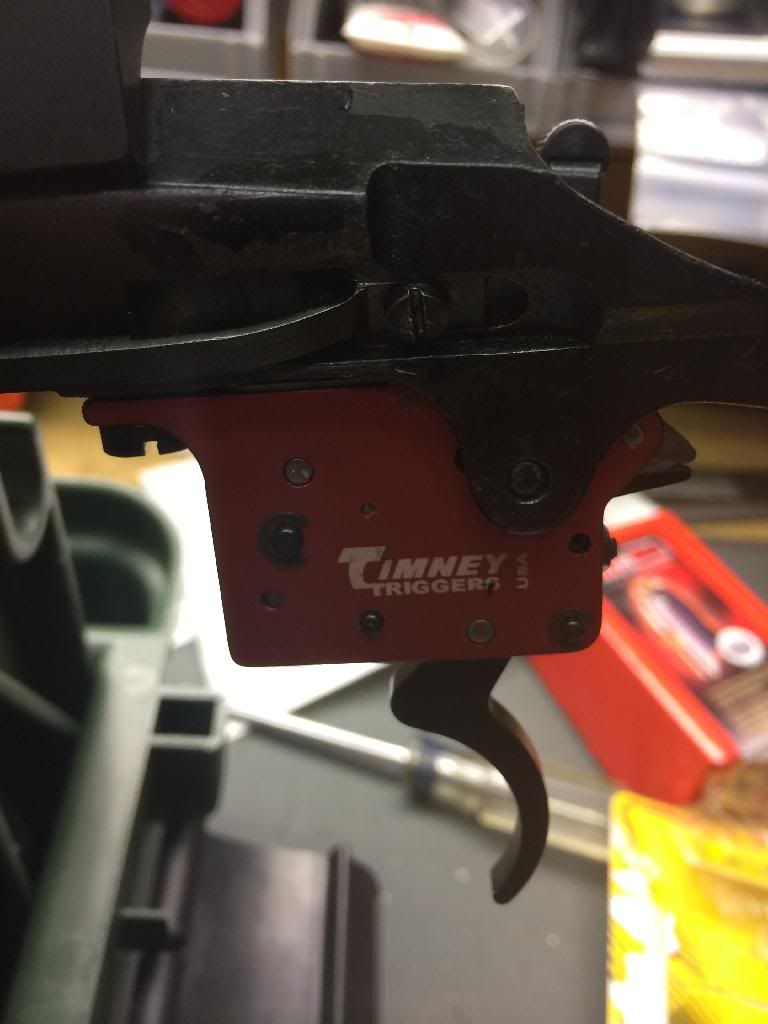 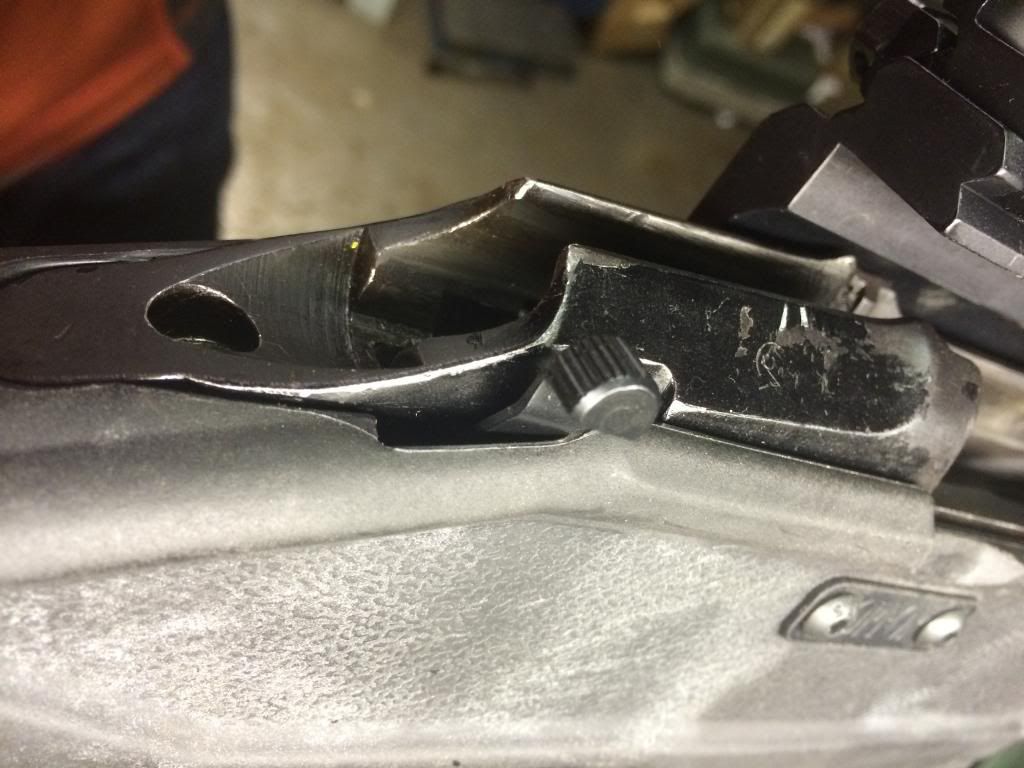 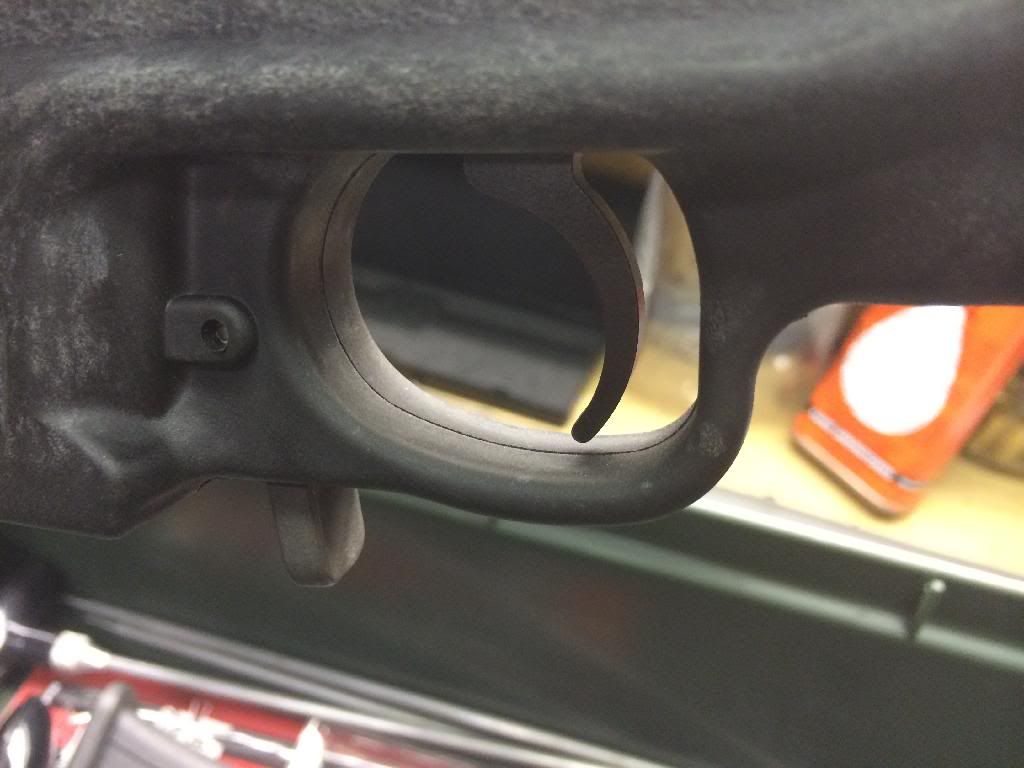 Step 2: I picked up a barrel threading kit from CNC warrior. Since I cut the barrel down previously, it was the perfect outside diameter for threading without needing to be turned down. Kit came with the die, handle, thread alignment tool, and cutting oil. worked like a charm. I plan to use a killer innovations brake when the group buy starts, but for now I installed one that I picked up from a show a while back. 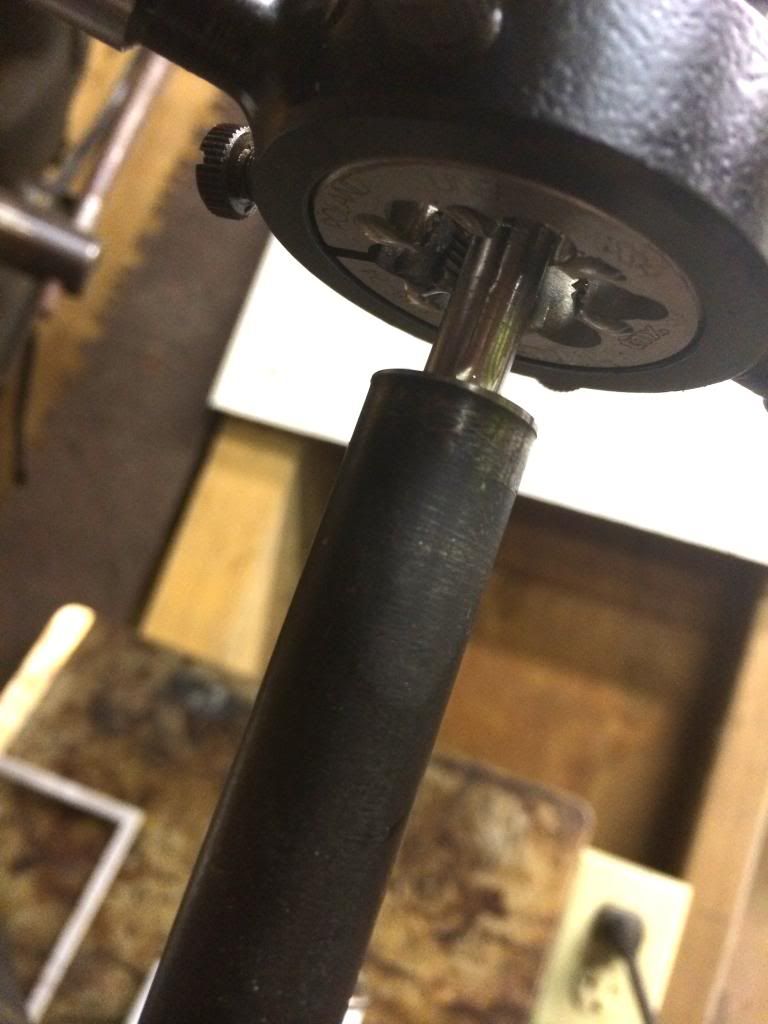 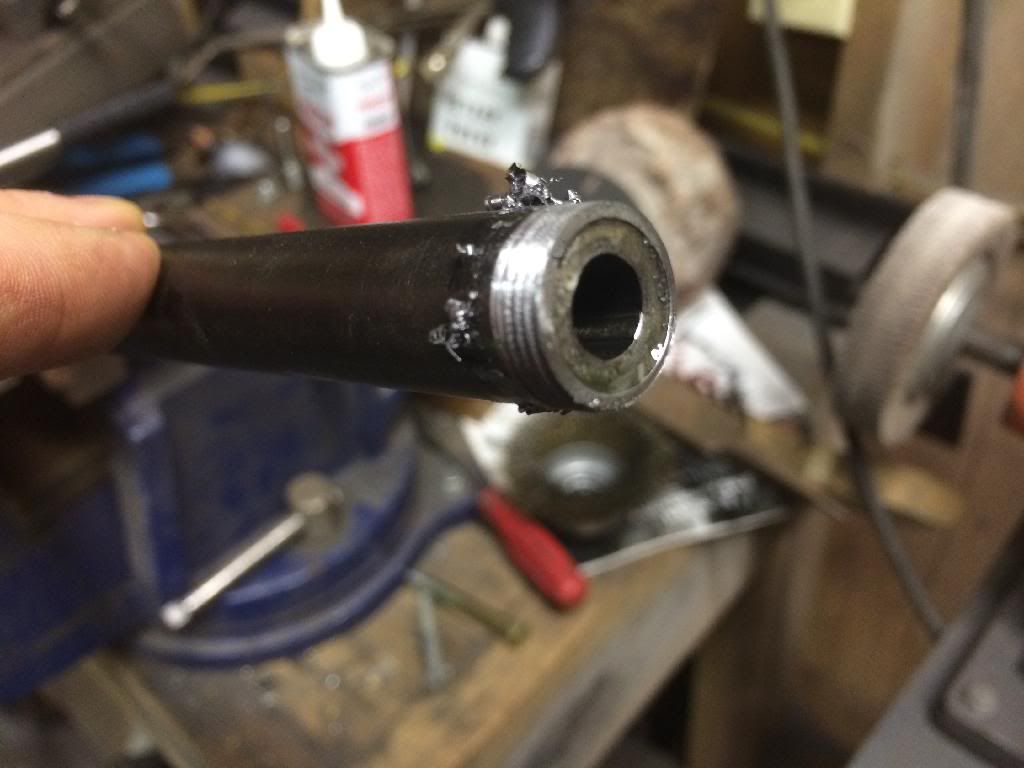 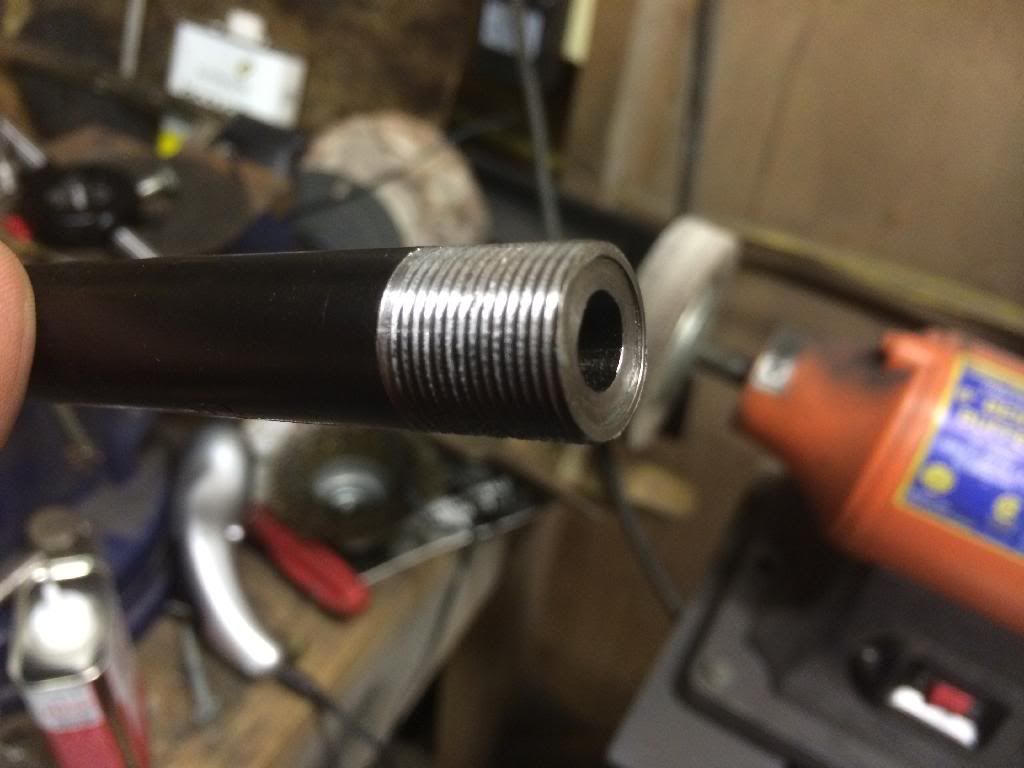 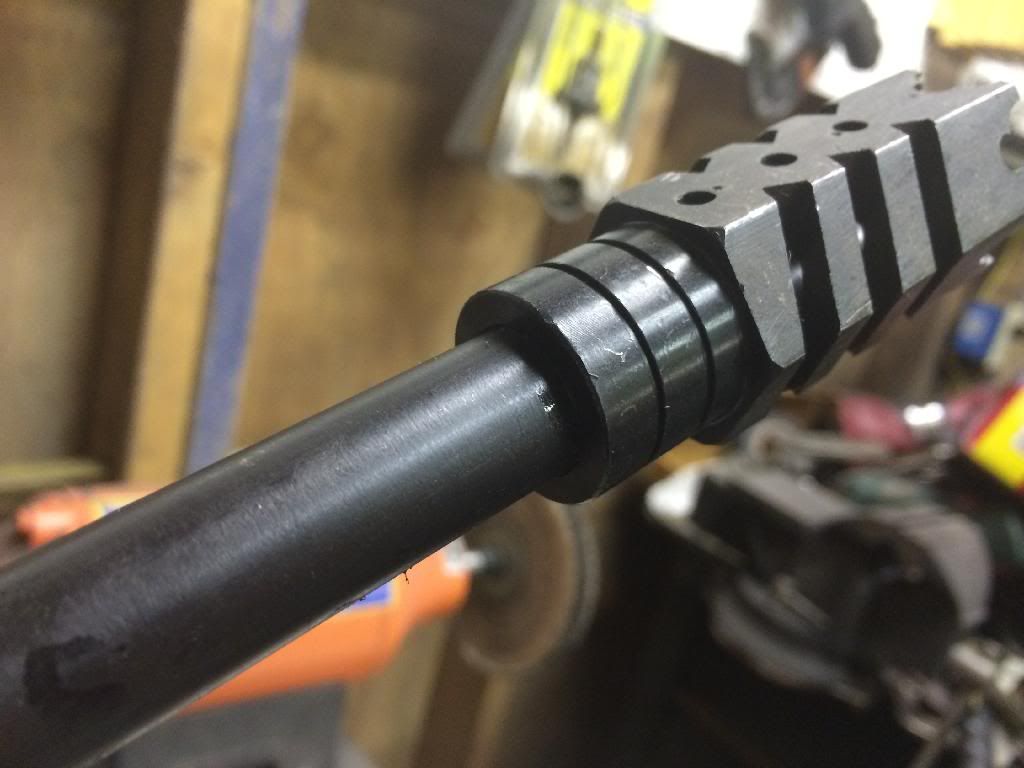 |
| Tue Jan 14, 2014 7:43 pm |
|
|
|
Page 2 of 4 |
[ 58 posts ] | Go to page Previous 1, 2, 3, 4 Next |
|
All times are UTC - 8 hours |
Who is online |
Users browsing this forum: No registered users and 45 guests |
| You cannot post new topics in this forum You cannot reply to topics in this forum You cannot edit your posts in this forum You cannot delete your posts in this forum You cannot post attachments in this forum |